Gears
- Cockpit drill
- Hand and foot controls
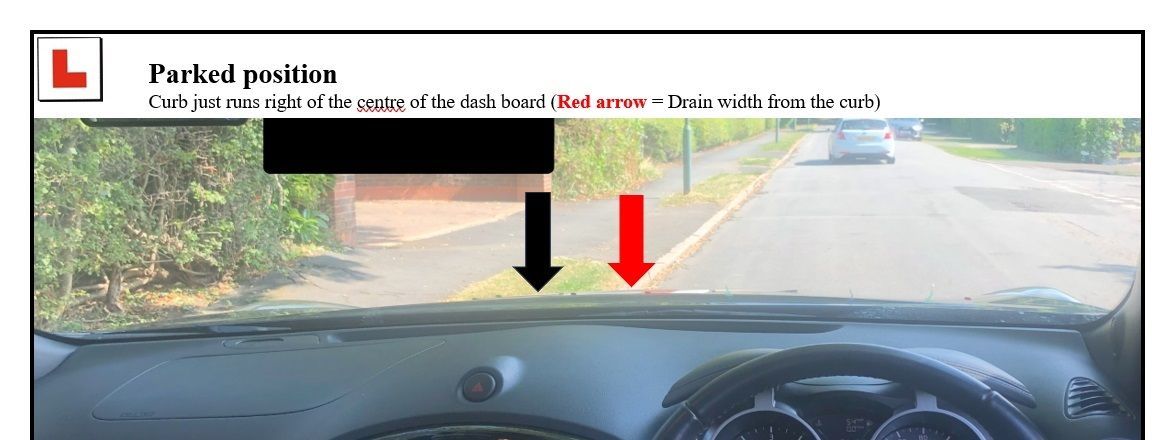
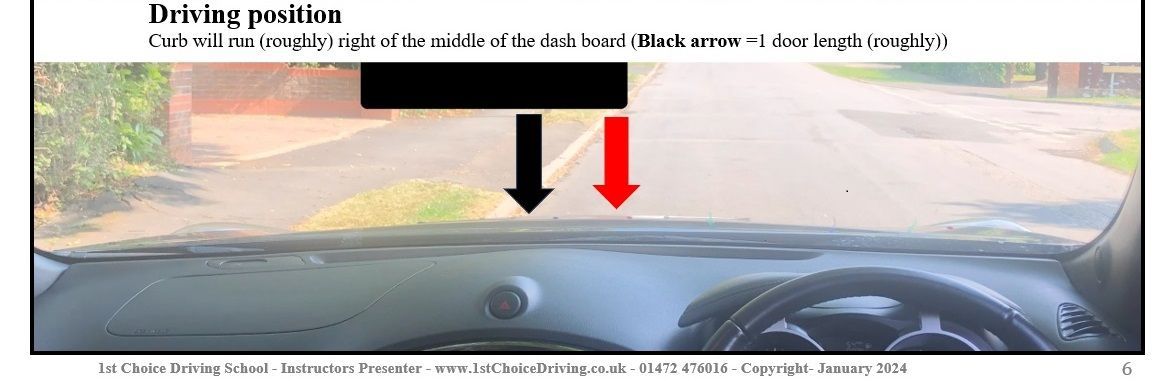
- Moving off and stopping (including improving parking closer to the Curb) on a quiet road on the left hand side
- Improve P.O.M when moving off and using M.S.M (S & G) when stopping
- Improve knowledge of the use of mirrors and signals at the appropriate times
- Co-ordination of (A, B, C) the accelerator, brake and clutch pedals
- Improve clutch control
- Different methods of gear changes up and down when using the gear stick (block and selective gears)
- Understand when to change gears up and down without engine breaking.
- Understand the difference between block and selective gear changes.
- Cockpit drill
- Hand/foot controls
- P.O.M, P.O.S.M, M.S.M, moving off and stopping
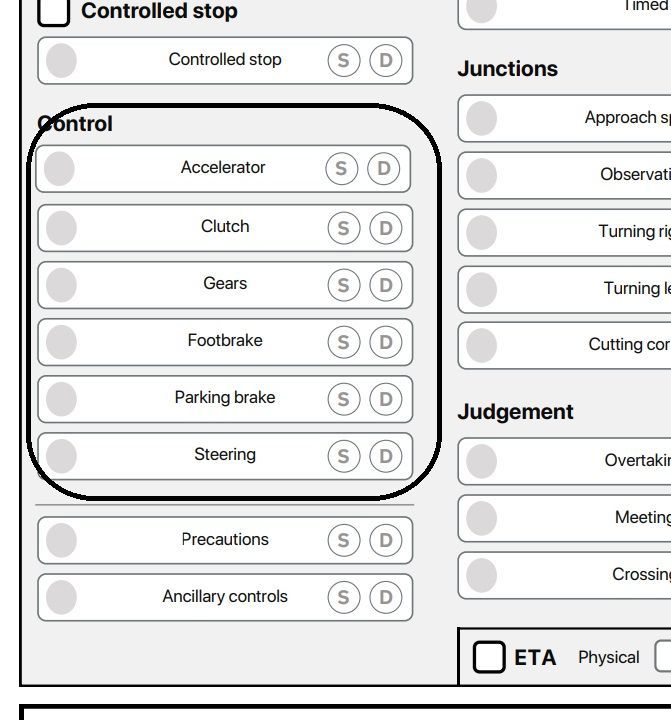
Controls
- You needed to show you can use all the car’s primary controls smoothly and at the correct time. This includes the:
- accelerator
- clutch
- gears
- brake
- handbrake or parking brake
- steering
- Your examiner will have monitored this throughout the test.
Examples of faults
- Some of the most common faults for this area include:
- over-steering when making a turn, and mounting the pavement
- keeping the clutch pedal held down (coasting) reducing your control of the car
- selecting the wrong gear causing a sudden reduction in your speed, forcing vehicles behind you to slow down
- pressing the brake too hard, or not hard enough
- Your examiner may have explained the specific details of any faults you made.
How you can improve in this area
- If you made faults in this area during your test, or if you want to improve in this area, you should:
- check rules 117 to 126 of The Highway Code
- read section 3 of ‘The Official DVSA Guide to Driving: the Essential Skills’ (2022 edition)
- If you need to rebook the test, spend time practising and improving this skill with your driving instructor or supervising driver. Use the time to familiarise yourself with the car’s primary controls.
- Control your vehicle as it increases and decreasing speed.
- Make appropriate gear changes up and down as you increase and decrease the speed of your vehicle.
- Understand block and selective gear changes.
Palming method
Palming method of gear changes will be taught on this lesson (explained more on your lesson).
Success with smooth and precise gear changes will ensure a correct gear change and reduce any implication of a wrong gear change resulting in stalling the training vehicle. The consequence of a wrong gear change could be at worse case scenario of stalling is a potential rear end collision. The key factor of success is keeping your left arm relaxed, then only use movement in your left wrist.
Best method of moving the gear stick in a steady, gentle movement using the palming method.
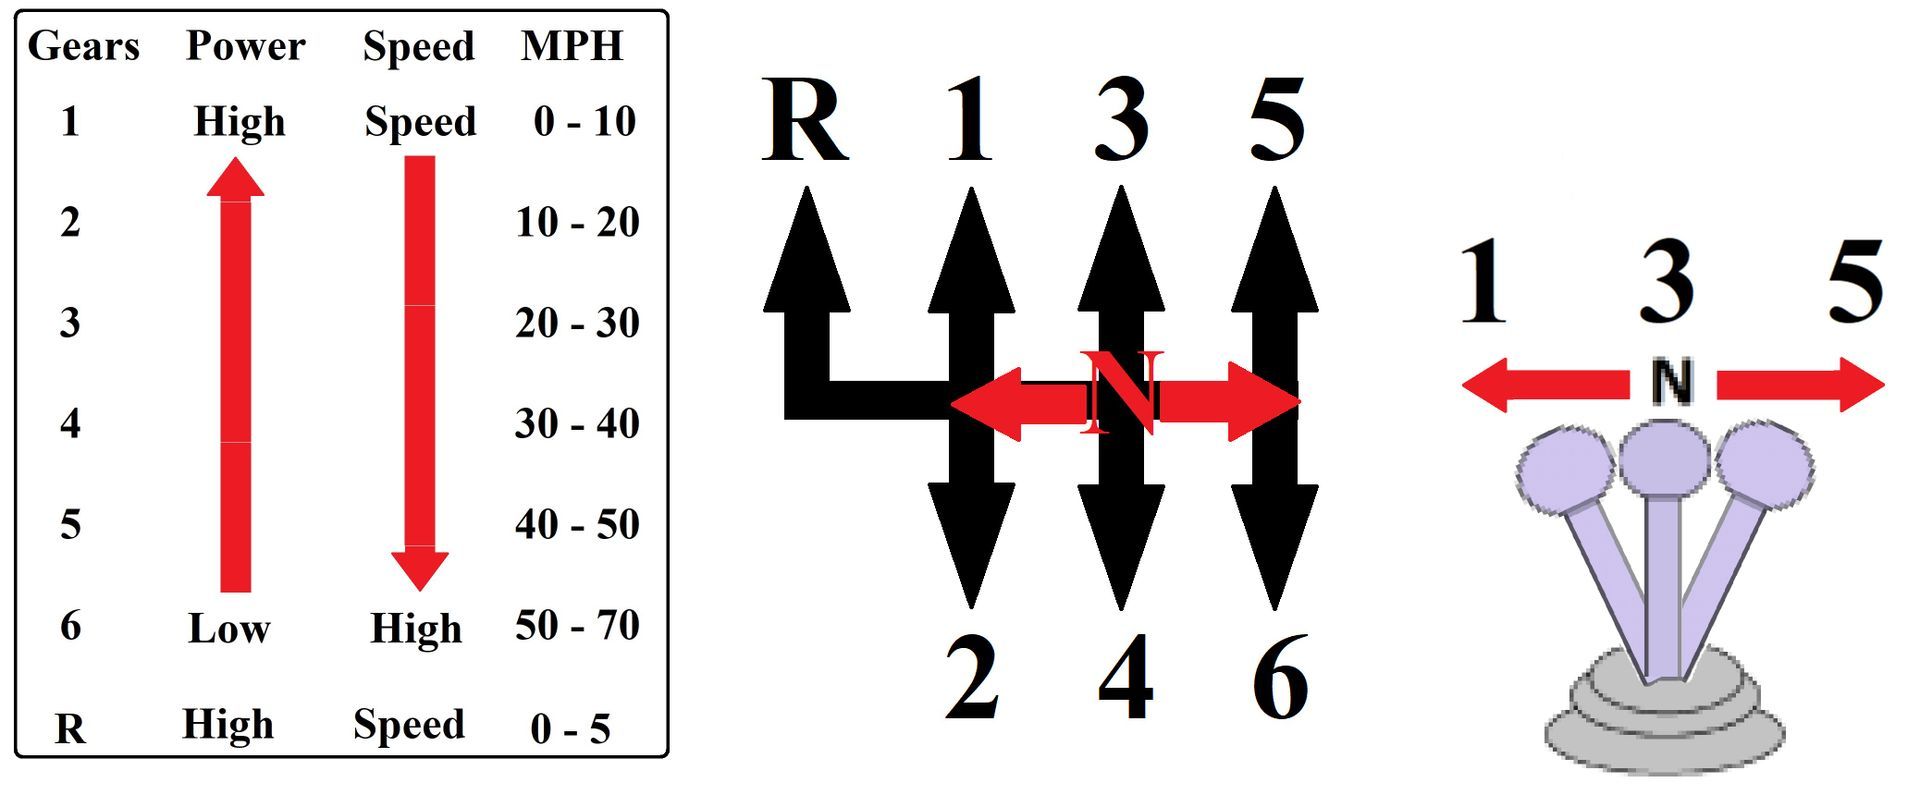
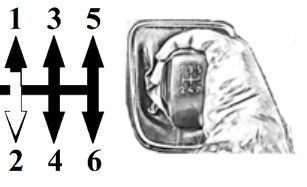
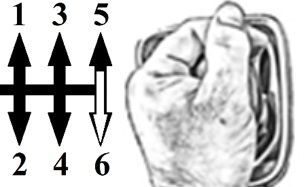
1st gear
To ensure palming is achieved ensure your thumb is pointing down and the gear stick and your left hand is cupping the top of the gear knob of your gear stick.
Push the gear stick from the neutral position over to left then gently push the stick into 1st gear.
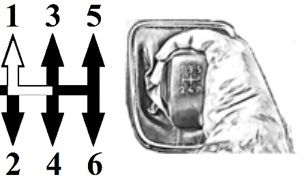
2nd gear
From 1st gear again use the palming method (thumb is pointing down and your left hand is cupping the top of the gear knob of your gear stick) push the gear stick firmly to the left again then pull the gear stick into 2nd gear.
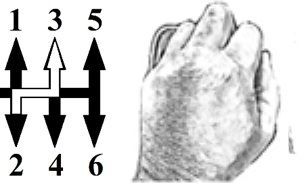
3rd gear
From 2nd gear place your hand on your gear knob (knuckles facing up), then gently push the gear into neutral and let the spring in the gear selector and let the gear stick naturally slide over to 3rd gear gate then push it gently into 3rd gear.
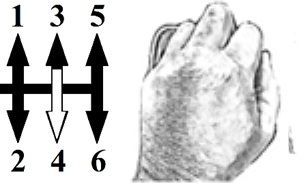
4th gear
From 3rd gear place your hand on your gear stick (knuckles facing up, then gently pull the gear stick down into neutral an down into 4th gear.
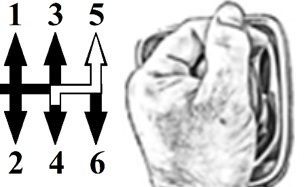
5th gear
From 4th gear place your hand on your gear stick (knuckles facing up) then gently push the gear stick gently up into neutral, then rotate your hand so your left hand is now cupping your gear knob thumb facing up, pushing the gear stick across to the right and push it up into 5th gears.
6th gear
From 5th gear place your hand on your gear stick then gently push the gear stick gently towards the 5th/6th gear wall then gently pull the gear stick down past neutral and into 6th gear.
What is the difference with selective and block gear changes?
There are two methods of changing your gears:-
Block gear changing and selective gear changes.
Block gear changes
Block gear changes was taught by driving instructors until the 1990's, the issue with block gear changes method is that you go up and down every gear using every one!!! i.e. 1-2-3-4-5 (going up every gear is not the problem as that's normal even now a days) but 5-4-3-2-1 is the issue is this ether make you coast or engine brake.
Coasting
Coasting is keeping your clutch down once you have changed gear, if you do not bring your clutch up once you have changed gears you are free wheeling and you could loose control of your vehicle.

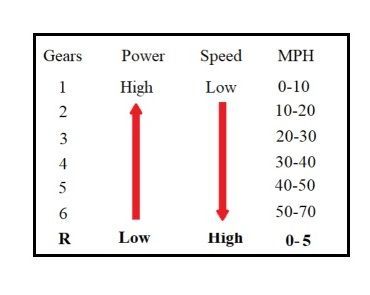
You only really miss gears out up when your entering a faster road or aim to overtake safely.
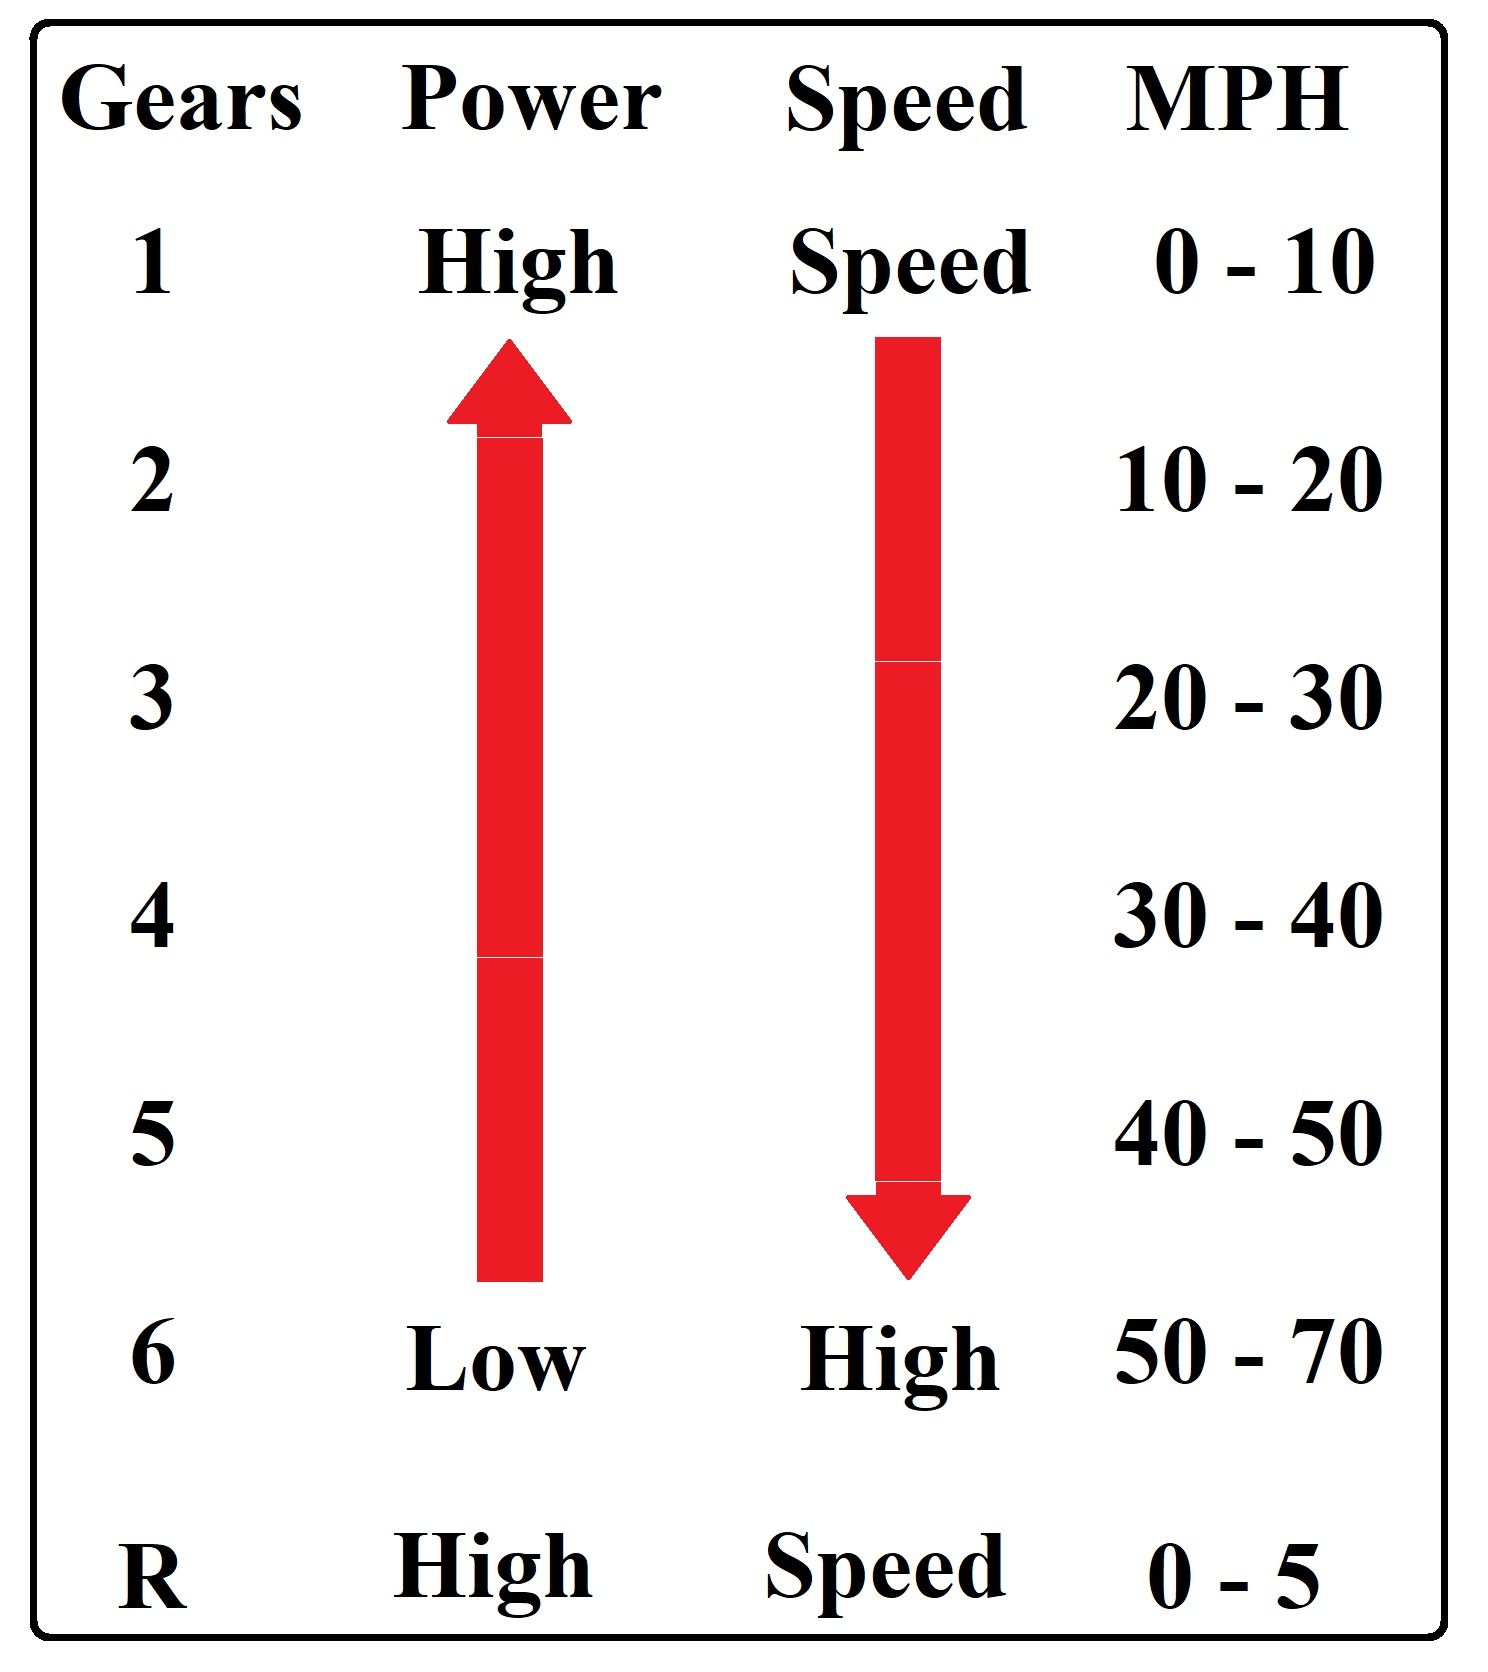
Speed ratio
The best way to advise you when to change gear is every 10MPH (on a town road) you change gears up or down. So put a naught at the end of you gear numbers on your gear stick (so 1st is 10mph, 2nd is 20mph, 3rd is 30mph and so on).

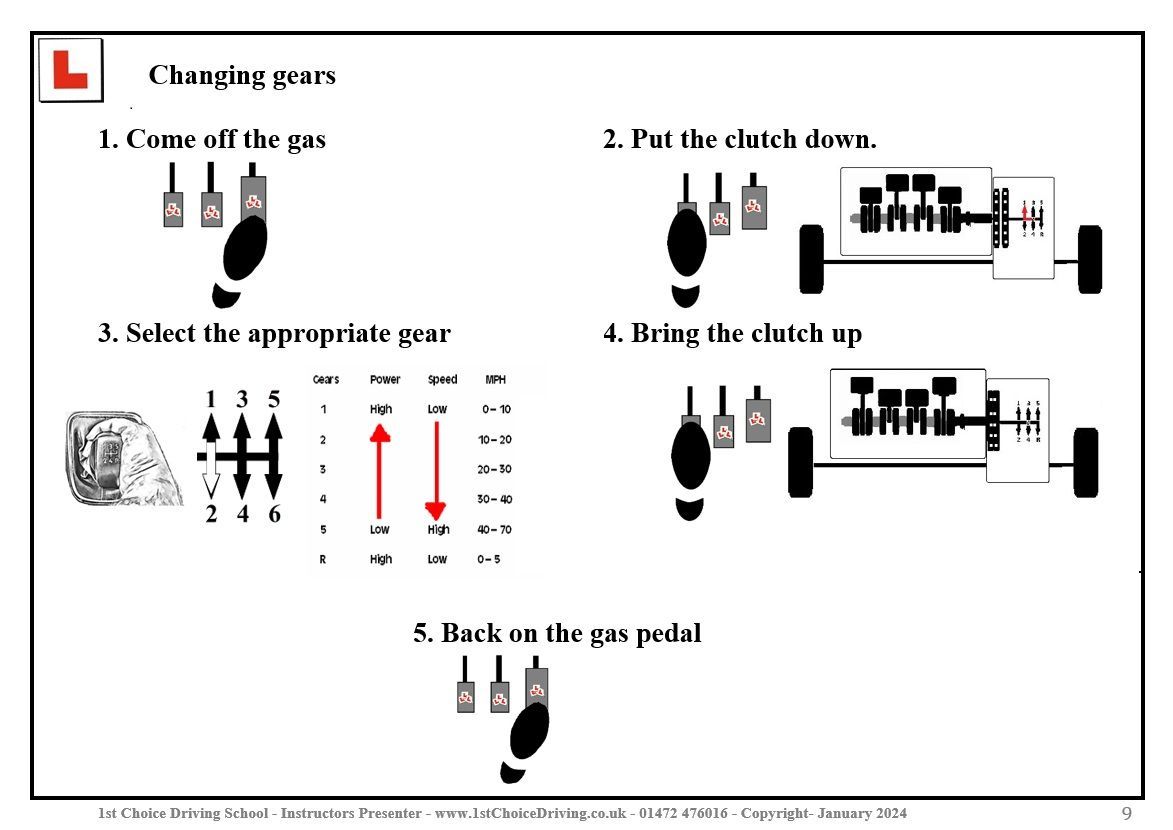
- Come off the gas pedal
- put the clutch pedal down
- palm the gear and pull the gear stick into 2nd gear
- Raise the clutch up
- Apply the gas (pedal)
- Come off the gas pedal
- put the clutch pedal down
- palm the gear and pull the gear stick into 2nd gear
- Raise the clutch up
- Allow the speed and gear ratio meet ( 2nd gear will do 10MPH with no gas)
Extra information that could be asked on the next three briefs
Once you have built your confidence up and being prompt with gear changes your instructor may challenge you to start working on your M.S.M routine in more detail.
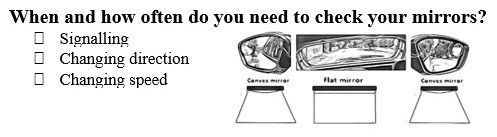
Mirrors
Use your mirrors efficiently and using your mirrors is very important :-
Always check your mirrors before you:-
- Every 6 to 10 seconds
- Speed up and down
- Change direction
- Changing seed
A high majority of unsuccessful students not passing their driving test is due to lack of mirrors (and use off), you also have to be careful not to take your eyes off the road ahead for too long.
- Who’s behind you?
- How close are they?
- How fast are they travelling?
- Have they turn of on the junction you have passed
- Have the started to overtake you
- In that case was it safe for them to start to overtake
Use of signals
Signals should use to help or warn other road users, cyclists and pedestrians of your intended actions.
The timing of your signal is important as too early or even too late may become misleading.
Different signals on your vehicle?
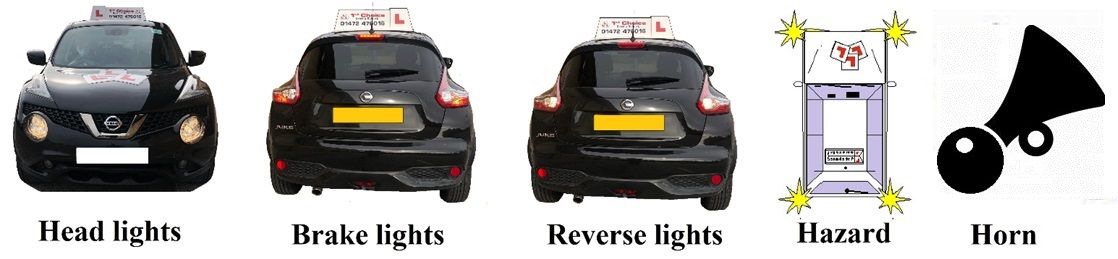
Other signals on your vehicles
- Head lights - Warns other driver's of your presents
- Brake lights - Warns driver's behind you are slowing down
- Reverse lights - Warns driver's behind you are reversing
- Hazard warning lights - warns all road users you have broken down
- Horn - Warns all road users, pedestrian's and cyclists of your presences
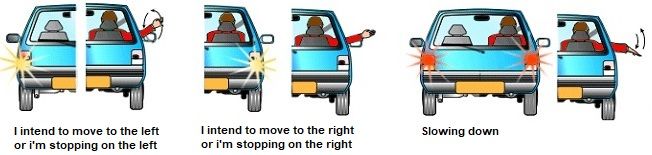
Hand signals
Braking and indicating can also be given by hand (shown below).
These can be used if you break down or are being towed to a garage or even if an indicator bulb blows.
- Agree learning goals and needs of todays lesson
- Agree appropriate lesson structure (full, partially or independent level of instruction)
- Practice in a suitable training area
- Agreed if needed to adapt the lesson plan to help the pupil work towards their new learning goals if any verbal or physical intervention was made by the instructor
- Directional instructions will be given in ADI format (Alert, direction and identify manor) given to the pupil clear and given in good time
- Agree if the students made a minor, serious or dangerous error on your lesson it will be broken down using F.I.S.H (fault, implications, solution & help) this method of feedback helps pupils understand what fault is being made and how to strategies on how correct the faults.
- Your driving instructor will adapt their teaching style to suite your ability and ability
At the end of your lesson
- At the end of each lesson you will have a debrief with your instructor giving you the opportunity to reflect on your performance on your lesson then you can set up new goals for your next driving lesson.
- This will also give you the opportunity to research any new topics that will be brought into on your next agreed lesson

