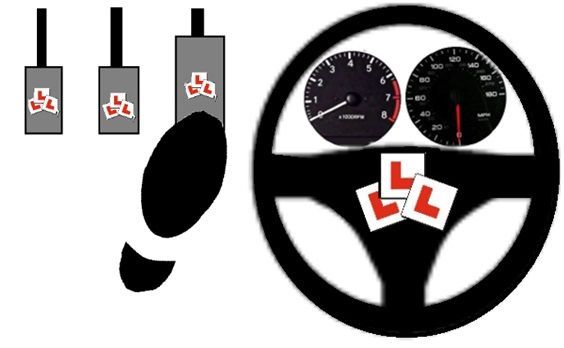
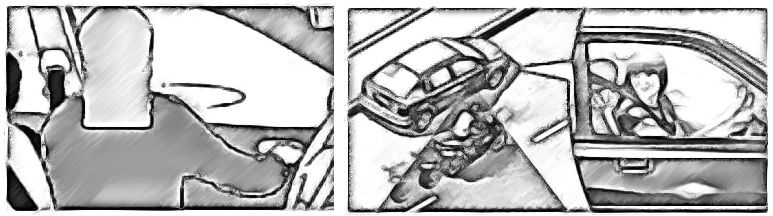
- The cockpit drill
- Introduce you to the main hand and foot controls of the vehicle
- Brief you on how to move off and stop your training vehicle under full control using the P.O.M, P.O.S.M and M.S.M routines
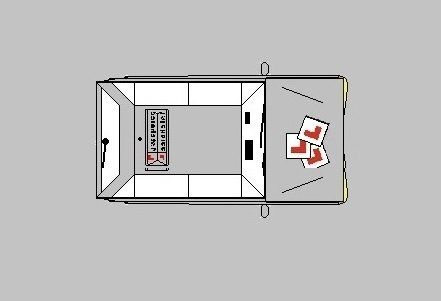
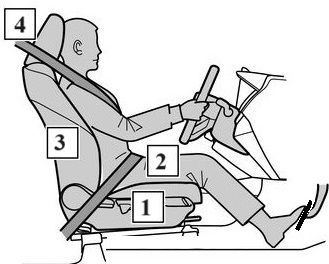
Before you started driving, you should have performed a few safety checks. This includes making sure:
- all doors are shut
- our seat is positioned correctly and you can reach all the controls
- your mirrors are positioned correctly
- the handbrake or parking brake is on
- the gear is in neutral
Examples of faults
Some of the most common faults for this area include:
- starting the car with the gear not in neutral
- adjusting seat or mirrors while driving
Your examiner may have explained the specific details of any faults you made.
How you can improve in this area
If you made faults in this area during your test, or if you want to improve in this area, you should:
check rule 97 of The Highway Code
read section 3 of ‘The Official DVSA Guide to Driving: the Essential Skills’ (2022 edition)
If you need to rebook the test, spend time practising and improving this skill with your driving instructor or supervising driver. Use the time to familiarise yourself with the car’s controls and features. Make sure you do all your checks before setting off including adjusting your seat and mirrors.
At the training location
Allow your student to:-
- Read a number plate from 20M
- While sat in the drivers/passengers seat find a reference point (for example a a man hole cover or drain). This can help with tyres and tarmac reference:-
- Firstly make sure that all the doors, bonnet and boot lid are firmly shut.
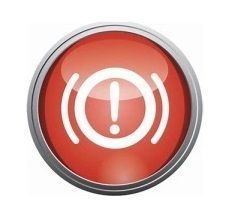
- The handbrake is on & the hand brake light is in the dash
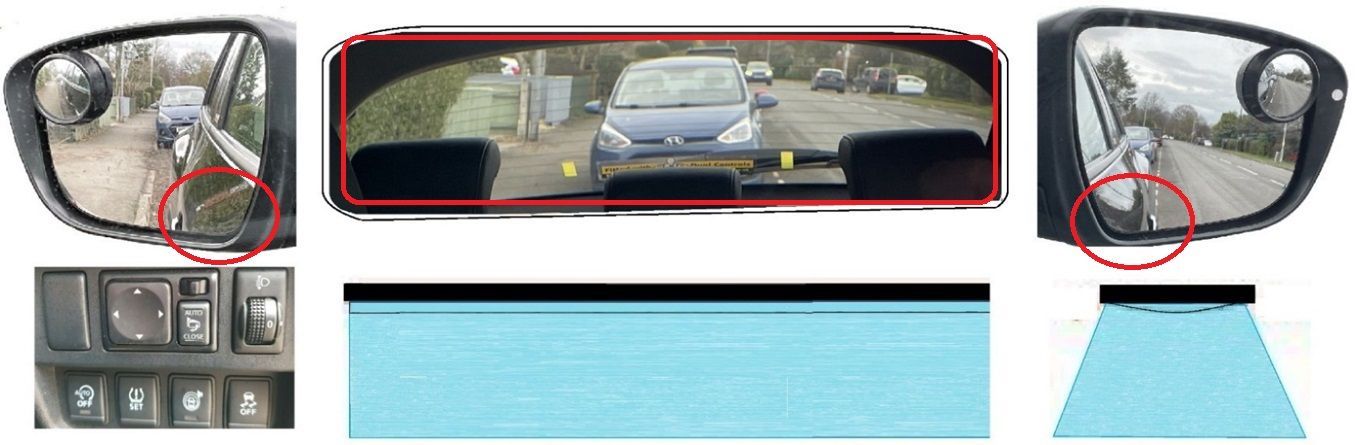
Use your left hand to adjust the interior mirror, be careful not to touch the surface of the mirror with your fingers (look in the rear view mirror and frame back window).
- To set the interior mirror, frame the back window with the outer frame of your interior mirror
- The mirror in the interior mirror is flat and gives you a true view.
- To set the interior mirror, ensure you can see the front door handles of front doors in the inside bottom corners of your mirrors
- Your aim is to see roughly 25% of your vehicle and 75% of the road beside you
- The view in the exterior mirror is curved and convex (giving the oncoming vehicles look further away).
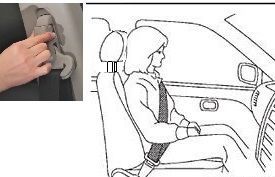
- Fasten your seatbelt and ensure your passengers fasten theirs also.
- Ensure no twists when you apply your seatbelt.
- There is a seat belt alteration near most drivers and passengers shoulders, so if your seat belt irritates your neck you can adjust it.
- The driver is responsible for seatbelt wearing by children under 14 years of age.
- Use appropriate child restraint as required by law.
- The accelerator (commonly known as the gas pedal) is used with your right foot.
- To control the speed of the vehicle gently press/depress the pedal, this will increase or decreasing the flow of fuel to o the engine.
- The vehicle will only move when the car is in gear and the clutch plates are together (explained more on this lesson).
- This pedal is also operated with the right foot
- Place your right foot inline with the brake pedal and pivot the right foot from the brake pedal to the accelerator whilst keeping your heel on the floor
- When you press the brake pedal the brake lights (on the back of the car) will be activated, this warns drivers behind you that you are slowing down or stopping
- The footbrake operates brakes on all four wheels and is used to slow/stop the vehicle.
- The pedal should be pressed progressively until you have stopped
- The best way to stop safely is to pulse the brake pedal, slowing the vehicle down gently and stopping in a safe, legal and convenient location.
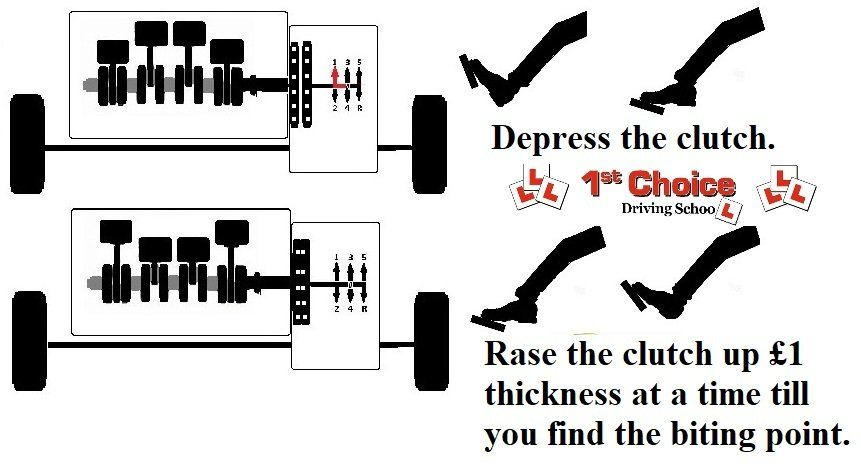
- The clutch is used with the left foot
- The clutch breaks the link between the engine and the gearbox (drive wheels) while the vehicle is running.
- To separate the engine and gearbox simply depress the clutch pedal to the floor and then release it slowly and smoothly (this finds the biting point)
- Best technique is to find the biting point then move the clutch pedal up a £1 coin thickness at a time until you find the biting point (all vehicles biting point will be at a different position)
- Slow use of the clutch will ensure you pull away smoothly with minimum amount of stalling
- Hold the wheel with your hands at the ten to two position and no lower than quarter to three
- Best control is gained with the pull and push method to turn the wheel
- The steering wheel is used to turn the front wheels when changing directio
- The indicator stalk is usually located to the left or right of the steering wheel.
- The stalk is designed for fingertip control.
- To signal left or right you simply move the stalk the direction you wish to go.
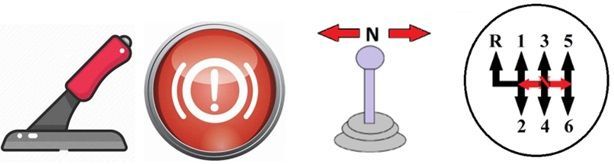
- You select each gear by using your left hand
- When changing gear you should use the palming method
- Always depress the clutch pedal before you select any gears when the engine is running and when moving
- There are usually five forward gears and one reverse gear
- However some more modern vehicles do have 6 forward gears
- Change gear every 10 mph, also the number of engine revolutions can help too.
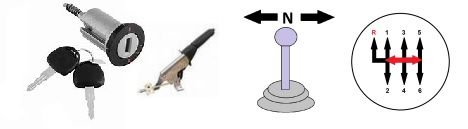
- Between the gears there is a position called neutral, when the lever is in this position no gear is selected and the engine is safe to start.
- The higher the gear the greater the pulling power (therefore the lower the engine speed).

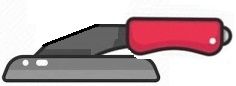
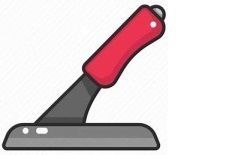
Handbrake
- The handbrake is used to hold the car still once you are stationary.
- The handbrake is connected to the rear wheels with a cable.
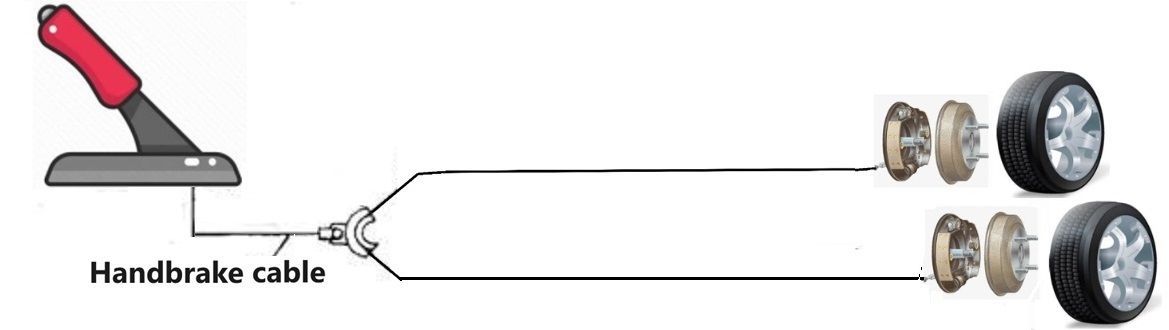
- Before starting the engine you should always check that the handbrake is on and that the gear stick is in the neutral position.
- Turn the ignition key clockwise and immediately release the key as the engine starts to avoid damaging the starter motor.
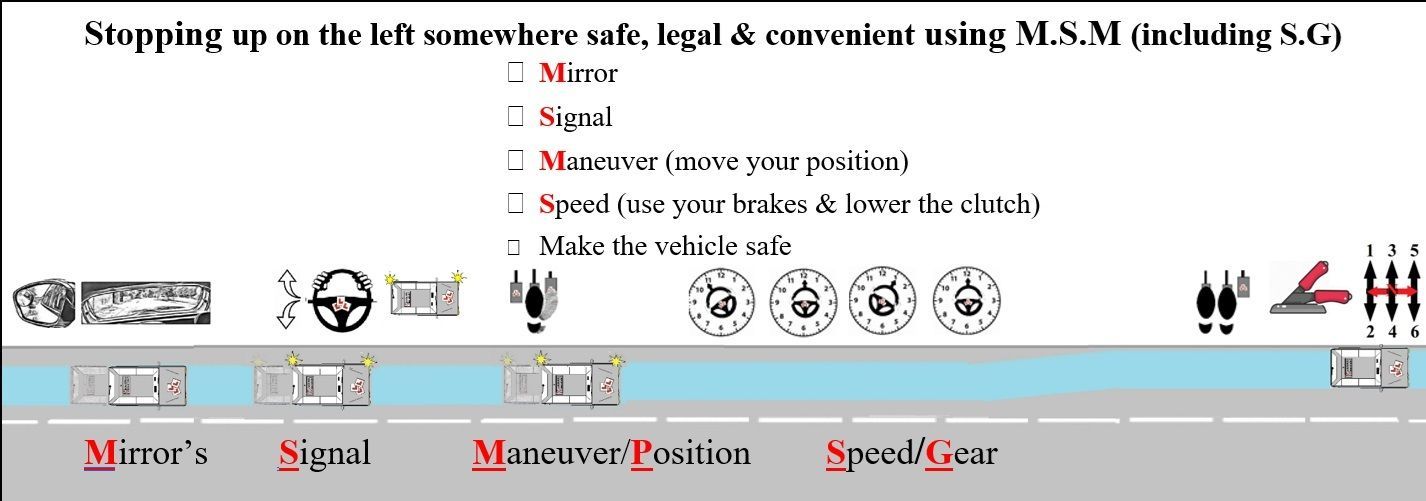
Moving off and stopping

- Put the clutch down and select 1st gear.
- Put your hands back onto your steering wheel.
- Slowly raise the clutch up a £1 coin thickness at a time until the sound of the engine drops achieving the biting point.
- Put light pressure the accelerator pedal to achieve a lively hum from the engine, then hold both feet still.
Check the path side first with your observations
- Firstly look in the (1)interior mirror
then the (2)left (nearside) door mirror, and then look over your (3)left shoulder.
- Next check the (4)interior mirror
again, then (5)the right (offside) door mirror
and then look over your (6)right shoulder
(your offside blind-spot).
- If it is safe to proceed (Consider your Signal to the right).
- When you are sure that it is safe to move off release the handbrake
- Make an extra right mirror and right blind spot check as you start to move
- Bring the clutch up a £1 coin
thickness at a time and slightly press the gas pedal
to generate sufficient power to move (See-saw your feet).
- Bring the clutch up
(very slowly) all the way.
- Steer to a normal driving position about a 1metre from the curb.
- Move the steering wheel an hour to the right (this will be explained more on your lesson).
- Cancel your signal (if necessary).
- Press light pressure on the gas pedal to pick up speed and look well ahead.
- Once your vehicle is just over a 1 metre from the curb
straighten your wheels and maintain a straight positioning in the road.
- Check your Interior and left door mirror (nearside) to ensure it is safe to pull up on the left
- Signal left if it will benefit any one
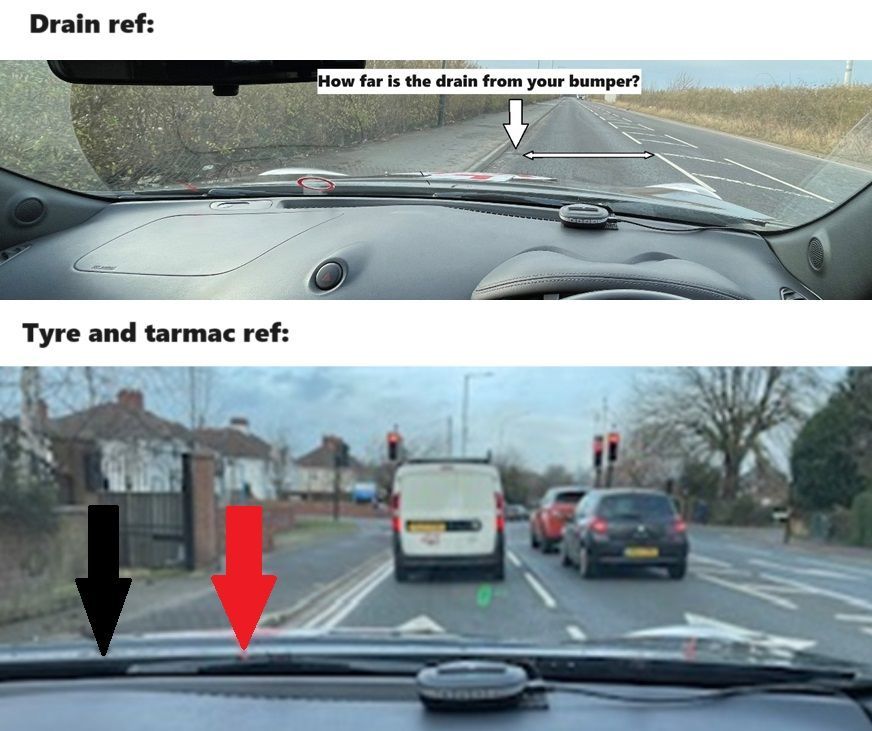
- Steer closer to the Curb, aiming to be about drain width from the curb (12inches)
- Squeezing the foot brake progressively harder to stop (squeeze with ease/pulse)
- Once down to 5/6MPH depress the clutch pedal fully down before you stop
- Once you have parked up on the left hand side of the road
- Make the car safe by applying the handbrake and putting the gear stick into neutral.
- Remove your feet from the pedals
and cancel the signal (if necessary).
Practice moving off and stopping.
Once you have practiced moving off and stopping a few times your instructor will reduce his/her support transferring his responsibility over to you.
Extra information
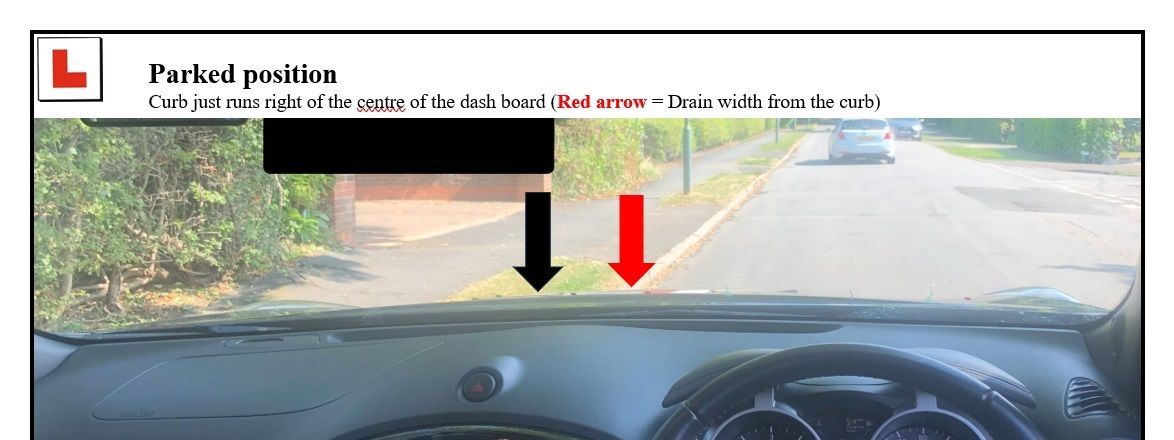
Parked up on the left hand side of the road
Use references on your front window to help you know where your two front wheels are, this will stop you from hitting or mounting the curb and going over the centre white line when you are going to cross the road and turn right.
Parked up reference
Parking reference you will find the curb is positioned roughly just right of the middle of your windscreen (red arrow on below picture)
I use points on the windscreen wipers to help students with referent points
(each vehicle could be a little different in view and also the height and position of your student in the driver's seat).
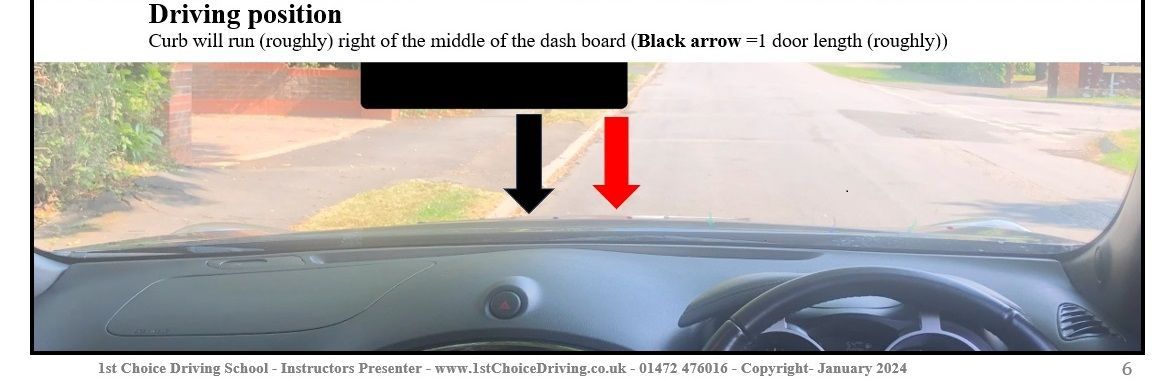
Parking on the left
When you want to park back on the left hand side slightly move your steering wheel to the left and aim the curb between the two arrows then straighten the vehicle to the curb.
Driving position
Driving position reference will be more to the centre of your front window.
You can clearly see the green arrow has moved from the pavement to the curb edge and the red arrow is a metre onto the road.
Lesson Planning
- Agree learning goals and needs of todays lesson
- Agree appropriate lesson structure (full, partially or independent level of instruction)
- Practice in a suitable training area
- Agreed if needed to adapt the lesson plan to help the pupil work towards their new learning goals if any verbal or physical intervention was made by the instructor
Risk Management
- Fully understood how the responsibility for risk would be shared on the lesson plan between instructor and student
- Directional instructions will be given in ADI format (Alert, direction and identify manor) given to the pupil clear and given in good time
- Agree if the students made a minor, serious or dangerous error on your lesson it will be broken down using F.I.S.H (fault, implications, solution & help) this method of feedback helps pupils understand what fault is being made and how to strategies on how correct the faults.
Teaching & Learning Strategies
Like mentioned earlier every student is induvial and each and everyone of you will progress at different rates so driving will adapt their lesson plan to help you achieve your driving goals.
- Your driving instructor will adapt their teaching style to suite your ability and ability
- Your driving instructor will continue to encourage you on your lesson and analyse any problems made and allow you to take responsibility for your own learning goals by giving you technical information to improve your techniques. Your technical feed back from your instructor will be ether given on the move or if feel needed by pulling you up on the side of the road somewhere safe, legal and convenient.
At the end of your lesson
At the end of each lesson you will have a debrief with your instructor giving you the opportunity to reflect on your performance on your lesson then you can set up new goals for your next driving lesson.