- Improving moving off and stopping
- Smoother gear changes
- Improving clutch control
- Co-ordination of your feet
- Understand the pull-push method of steering
- Confident building finding your biting point (using clutch control)
- Smooth gear changing with little or no conscious thoughts (may not happen on this lesson)
- Understand points of turns on corners and execute a safe and smooth turn when turning left, right and emerging
- Improve P.O.M, P.O.S.M, moving off and stopping
- Learn the pull/push method of steering
- Learn how to get to a give way or stop line
- How to turn left, right and emerge
Phase 1
Getting to the give-way line
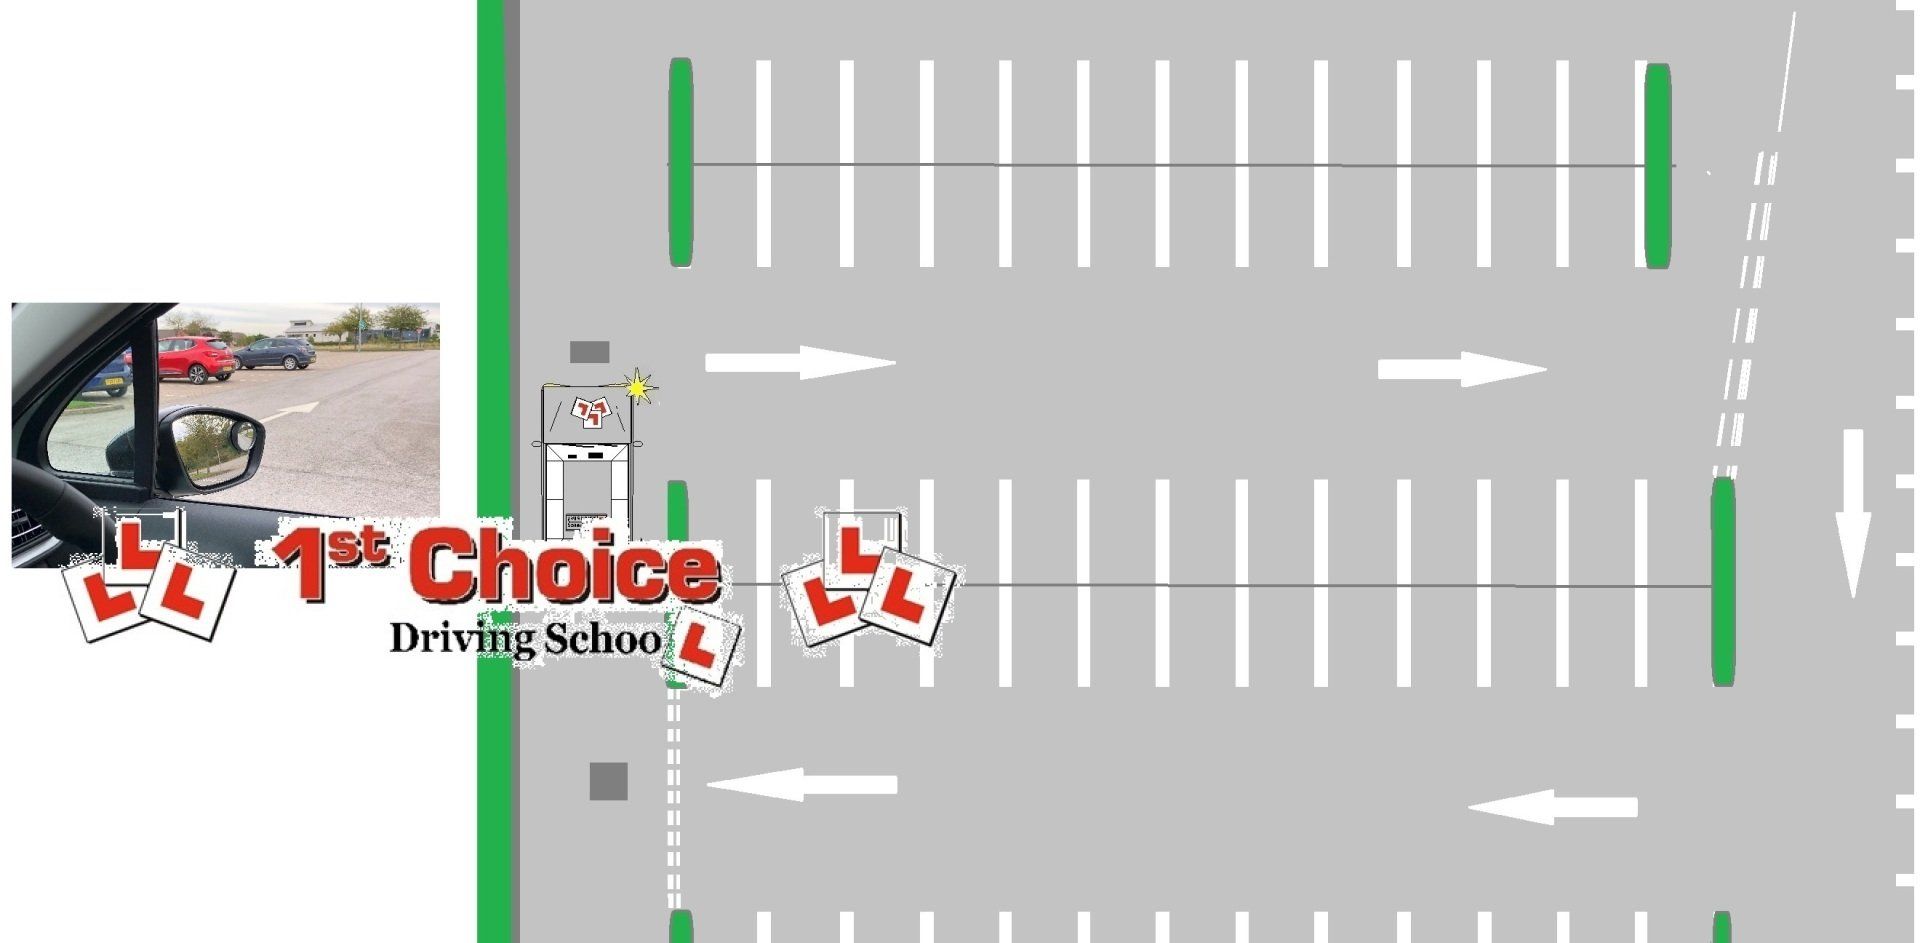
Once you have mastered the pull push you will then learn how stop behind a give-way line with the using the bottom of your wing mirror and using the edge of the bay as the white line. This is the best visual reference point to know you have stop behind the white give-way/stop lines.

So as you can see in the above picture if you run the bottom of the wing mirror on the white line it puts your vehicles bumper roughly a foot from the parking bay, use this method to stop behind a give-way or stop line.
Phase 2
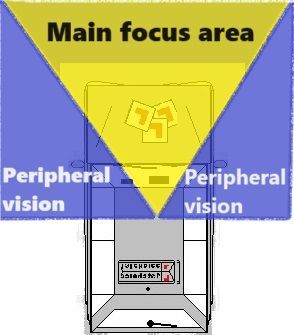
Reference points
As discussed on a previous lessons you can use references in your front window by using the bottom of front windscreen (using the centre bottom of the windscreen).
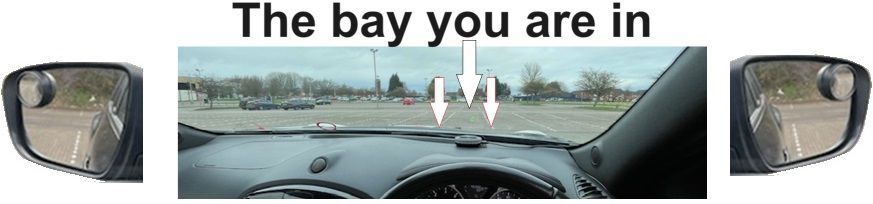
Using the below picture, use the bay directly in front of you and look to where the white bay lines are in the bottom of your front windscreen.
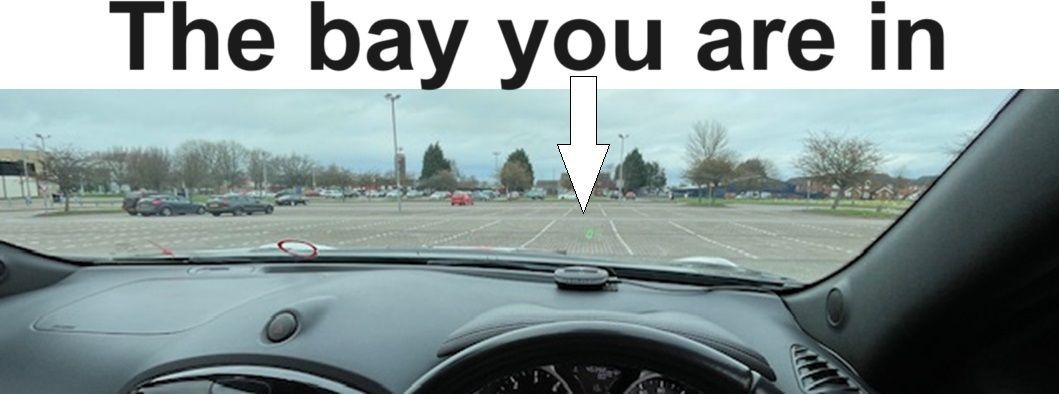
- Nearside (Left) /white/red arrow should be pointing on or just over the white line
- Nearside door mirror view, you should see the white line 6/8 inches before the side of your training vehicle)
- Offside (Right) white/red arrow is pointing just before the centre line
- Offside door mirror view, you should see the white line again 6/8 inches before or on the centre white line)
Front two wheels
With this in mind just inside off the red and white arrows will be your two front tyres, Try this it really works.
Knowing where the Nearside (passenger) front and Offside (drivers) front wheels are in relation to where you are sat in the drivers seat will help your parking up on the left hand side of the road without hitting the kerb or or parking really wide.
I've found (roughly) 6 inches right of the centre of the dash board will give you a good ides of where your front will be (example the red arrow in the picture below).


Phase 4
Practice U turns
Phase 5 (if not already of been briefed)
Using the M.S.M routine
Now you will briefed on the use of M.S.M routine and then you will incorporate the pull/push method of steering to the left and right using the Mirror, Signal and Manoeuvre routine in the carpark.
You will also be given references on turning left & right.

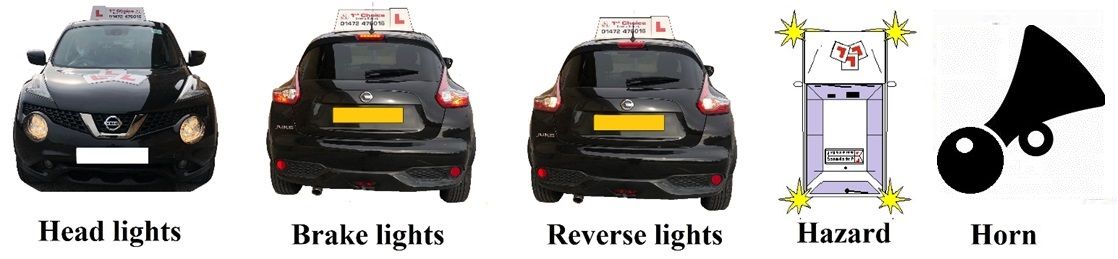
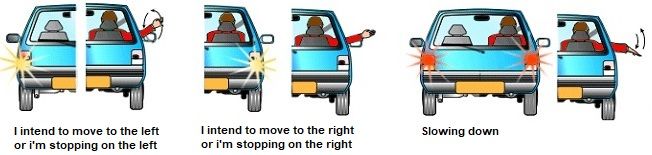
Hand signals
- Do you ever wave a pedestrian on?
- Do you Know how you can you back up your signal?
Phase 6
Once you understood the pull/push method of steering and can stop in a bay without going over the bay line. You will then cover turning left, right and emerging in the car park.
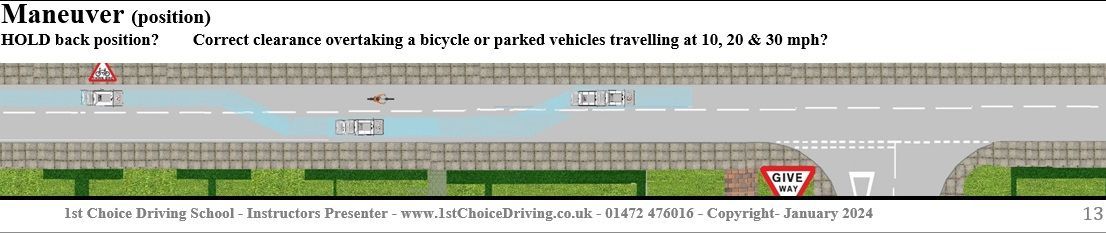
Manoeuvre
Discus why you need to have a good road positioning with your vehicle as it is vital when on a public road then you could be asked a few questions on adequate clearance.
- Agree learning goals and needs of todays lesson
- Agree appropriate lesson structure (full, partially or independent level of instruction)
- Practice in a suitable training area
- Agreed if needed to adapt the lesson plan to help the pupil work towards their new learning goals if any verbal or physical intervention was made by the instructor
- Fully understood how the responsibility for risk of the lesson would be shared on the lesson plan between instructor and student
- Directional instructions will be given in ADI format (Alert, direction and identify manor) given to the pupil clear and given in good time
- Agree if the students made a minor, serious or dangerous error on your lesson it will be broken down using F.I.S.H (fault, implications, solution & help) this method of feedback helps pupils understand what fault is being made and how to strategies on how correct the faults.
- Your driving instructor will adapt their teaching style to suite your ability and ability
- Your driving instructor will continue to encourage you on your lesson and analyse any problems made and allow you to take responsibility for your own learning goals by giving you technical information to improve your techniques. Your technical feed back from your instructor will be ether given on the move or if feel needed by pulling you up on the side of the road somewhere safe, legal and convenient.

