Introduction.
December 4th 2017 had big changes to the (B) driving test as the DVSA took removed the
left and right reverse around the corners and
the turn in the road exercises
and replaced it with
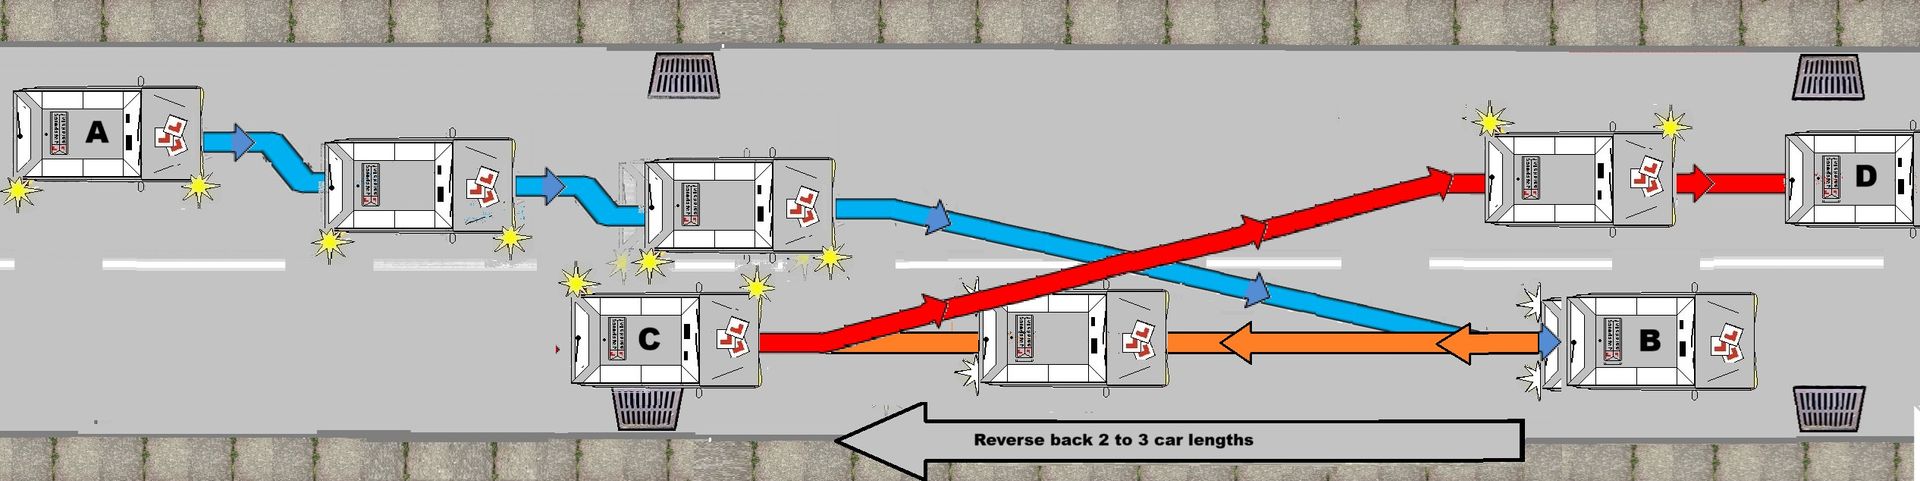
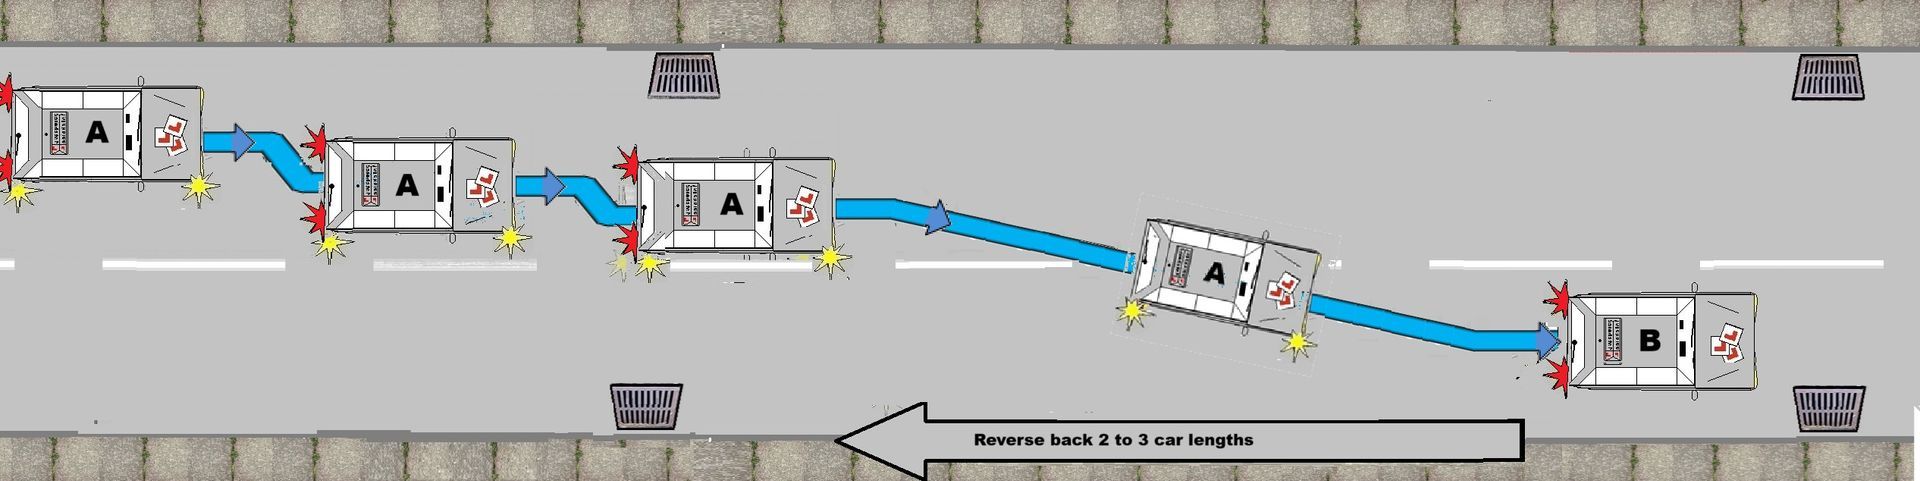
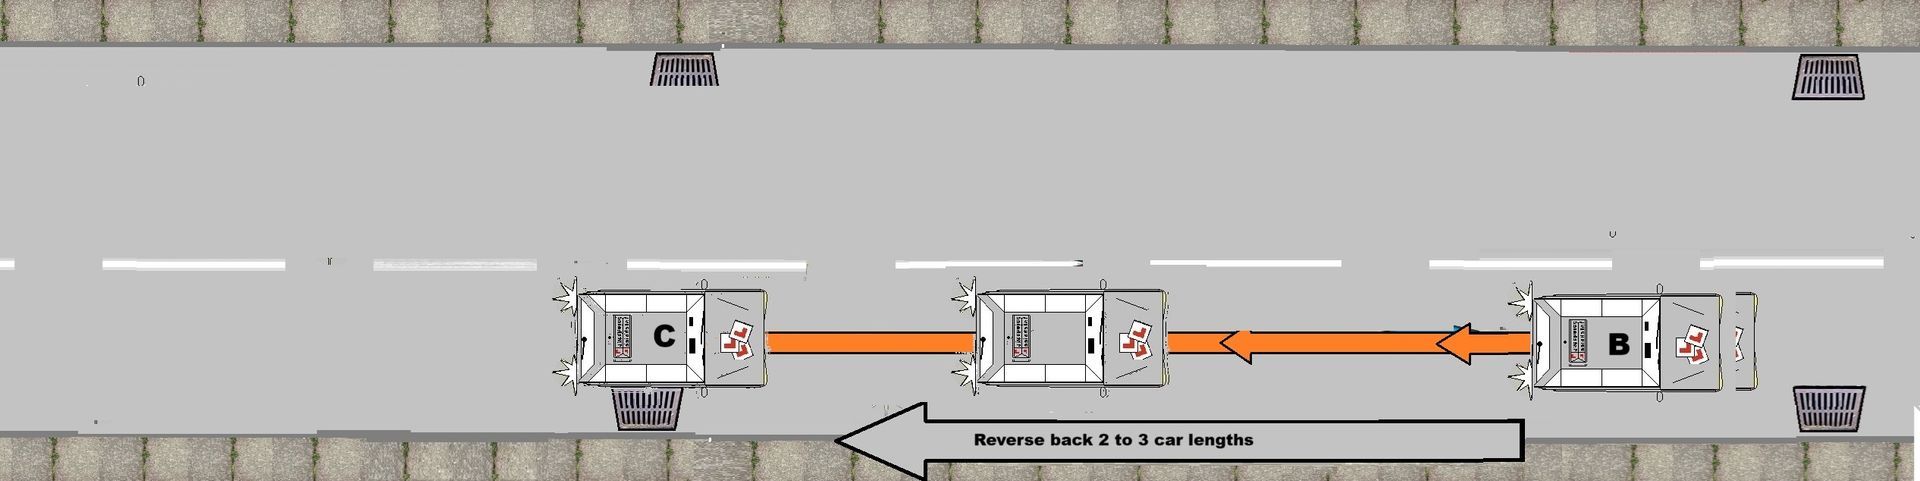
driving into a baying bay and park on the right hand side of the road and reverse back 2/3 car lengths.
Your instructor may still cover the left/right reverse around the corners and the turn in the road just in case you ever go the wrong way on your test (or in life once you have passed your test) as you will need to know how to turn your vehicle around.
Once you have covered reversing in a straight line on the left hand side of the road you will then cover the next exercise "pull up on the right hand side of the road and reverse back 2/3 car lengths".
This is a new exercise (started in 2017) and believe it or not you will probably use this exercise a lot once you have passed your driving test. You would use it if you want to park on the opposite side of the road you are driving on.
There is not always a parking space on the left hand side of the road so using a safe, legal and convent space on the right hand side of the road would be a practical option.
This exercise is about using forward and revere gears while observing and stopping for vehicles coming towards you.
Like all manoeuvres around observations and clutch control is very important on these reversing exercises.
At this stage of your training your:-
- P.O.M routine (moving off)
- Steering to a safe driving position and pulling up on the left
- Clutch control
- Co-ordination of foot controls including gear changing up and down
- M.S.M routine at junctions and more complex junctions
- Adequate clearance around stationary vehicles and slower moving vehicle (cyclists and pedestrians)
- Junction work
should be improving and getting more independent
Agreed lesson is covering :-
- Reversing in a straight line on the right hand side of the road
You will continue to develop with last lesson brief:-
- L.A.D.A & M.S.P.S.G (main road to side road)
- Two second gap
- Hold back position
- Meeting , overtaking, adequate clearance when overtaking stationary & slow moving vehicles
- T and Y junctions
Agree level of instruction
Intervention
Agree what part of the lesson is going to be a instructor-lead-lesson and what part will be client-centred-lesson and if it is client-lead agree if the instructor has to intervein verbally, take control of the training vehicle by ether using the dual control or take the wheel the lesson plan may need to be changed until the fault is fixed.
F.I.S.H
- Fault
- Implication
- Solution
- Help
Lesson aims and strategies
The aim of today’s lesson is to incorporate the Look, Asses, Decide, Act and Mirror, Signal, Position, Speed, Gear routine's when reversing in a straight line on the right hand side of the road.
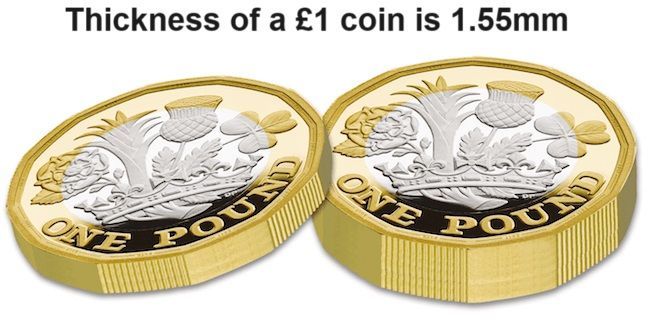
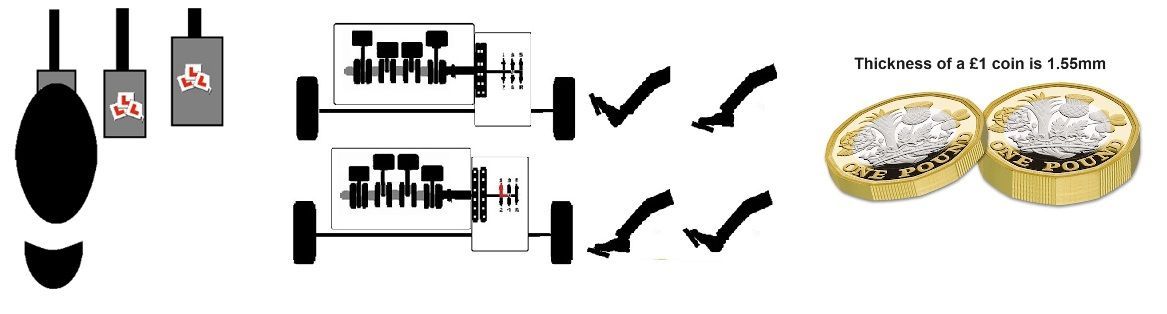
Reversing in a straight line will help to develop your clutch control as you move the clutch from the biting point £1 thickness up and down from the biting point.
Risk responsibility objective's
On the way to the training location you and your instructor will agree the level off support from your instructor:-
- Full talk through
- Prompt
- Independent.
This is important to ensure that the instructor and student understands who has the main responsibility on the control of the training vehicle on the set lesson plan.
Your level of instruction will be given by your instructor to a level to suit you from full talk through then reducing your support to either prompt or independent.
Lesson brief
The straight line reversing exercise will be taught to you at a certain point in your training, all driving instructors alter lesson briefing to suit students needs, however all lesson briefs are agreed at the end of each lesson lesson giving you the opportunity to read the relevant brief (gestalt).
Today’s lesson we will be learning how to park up on the right hand side of the road and reverse in a straight line.
- When planning to park on to the right hand side of the road make sure it’s a safe, legal and convenient location.
- Try to position your car parallel to the right hand Kerb.
Once you can complete your manoeuvre on a quiet road you will challenged to crossing a busy road and park up on the right.
Location.
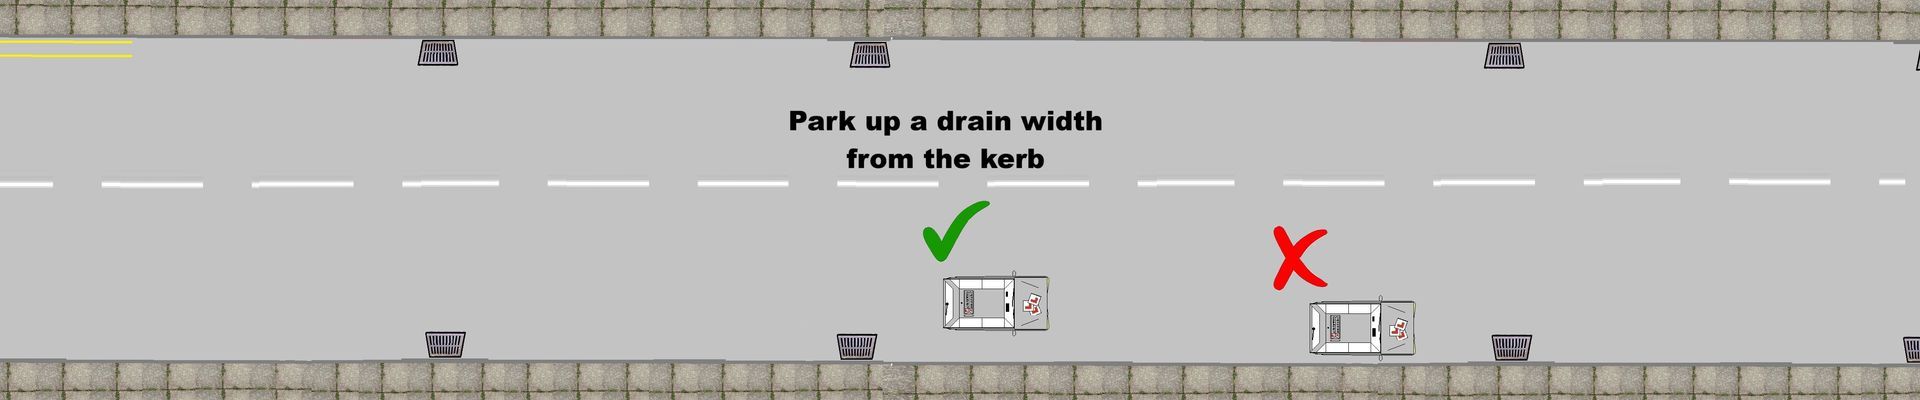
Once you have got to the training location you will be advised to park up slightly wider (and parallel) from the kerb.
Make sure you are parked somewhere safe, legal and convenient.
- Park (roughly) a 1ft (drain width) from the kerb.
- Ensure it’s free from parked vehicles, obstructions and no debris on the road as you don’t want to
get a (puncher) flat tyre.
- Never reverse on a main road and DO NOT reverse on a one way street for a long period of time.
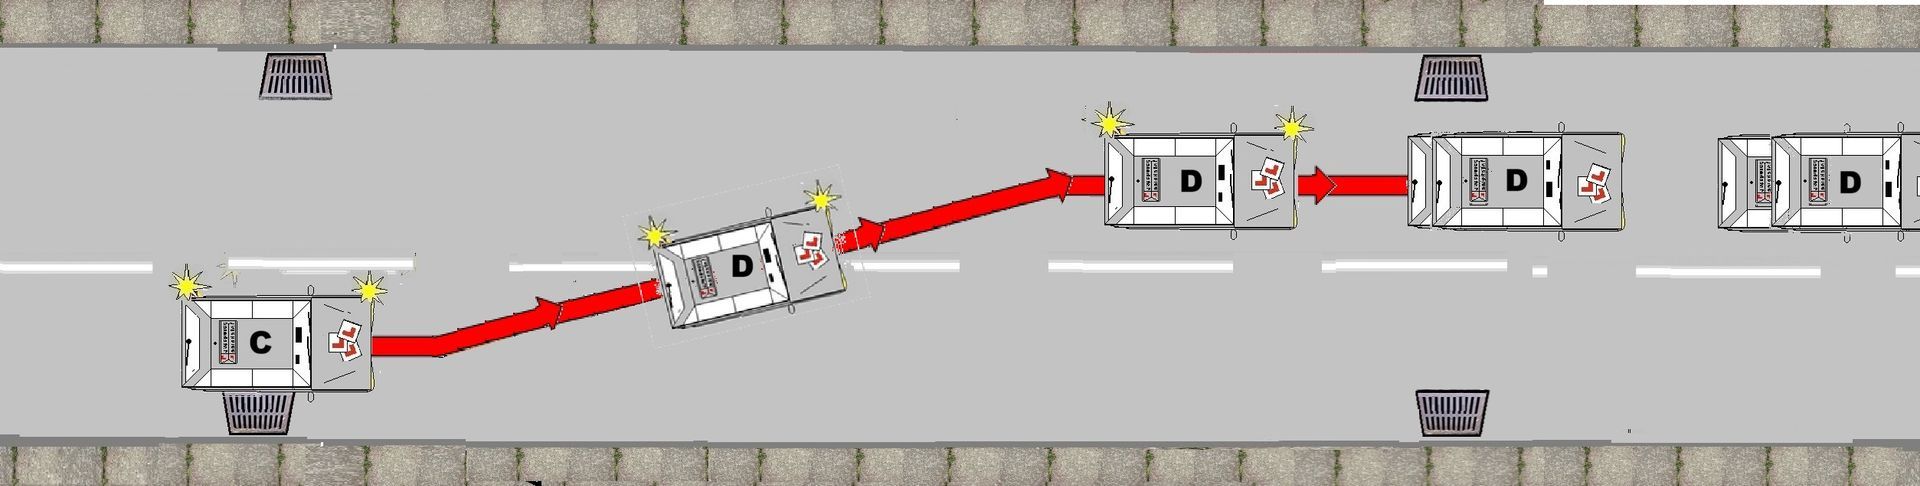
Below is a diagram of the excise from A to B then reverse back to to C then drive on to D.
Recap
Hand(s) position
While reversing you would usually hold the steering wheel with the right hand at the 12/1 o’clock position and optionally the left hand at the 6/7 o’clock position (this will help you to maintain a straight line).
Movement of your Steering wheel
When pulling up on right hand side of the road move your steering wheel slowly and roughly about an hours movement and guide your vehicle to the right hand side of the road and close to the kerb.

The same amount of movement is needed when reversing and correcting your positioning (if needed).
To recap the direction of use of the steering wheel look at reverse on the left hand side of the road brief.
2. Their could be a couple of vehicles coming towards you so you will have to modify your speed to allow the vehicles to get past you (once it is clear continue to park on the right hand side of the road).
3. There's no vehicles approaching you so you can steadily drive onto the right hand side of the road and then make the car safe.
The above situations will be no different then turning right and working out the timing of the oncoming vehicle so you already have this knowledge and skill when pulling up on the right hand side of the road.
Signal your intentions clearly
Always use the M.S.M/P.S.G & L.A.D.A routines to ensure you know what is behind you and always make your intentions are clearly known:-
- Apply your right indicator
- Apply your brakes in good time (brake lights will activate)
This will dictate your intension to all road users, cyclists and pedestrians know your intension and stop on the right hand side of the road.
Position on the right hand side of the road
Park about 12" (30cms/drain width) from the curb.
Apply your hand brake then get ready to reverse.

Extra information
Seating position/use of seat belt
By law you are allowed to remove your seatbelt, however it’s not practical as you could forget to put it back on before you drive on or even if you need to abandon your manoeuvre as for example a vehicle has come to close behind you and you had to drive forward. You will always need to put your seatbelt back on before you drive forward.
Releasing your seatbelt can help you to observe more, however if you shuffle around in your seat you can look through the rear window by looking over your left shoulder.
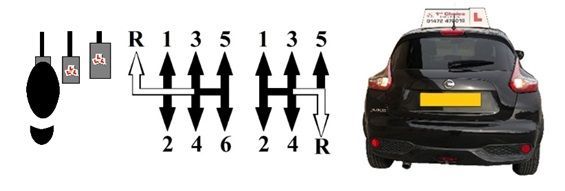
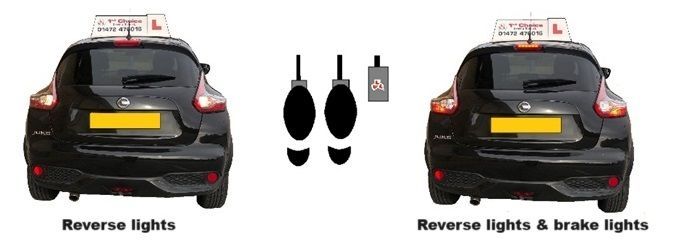
Selecting reverse gear activates your reverse lights this allows traffic know you are reversing.
Observations
Reverse the 6 point check, Observe from your right shoulder to the left shoulder, so you’re looking the correct way (over your left shoulder) once you start to reverse.

B to C
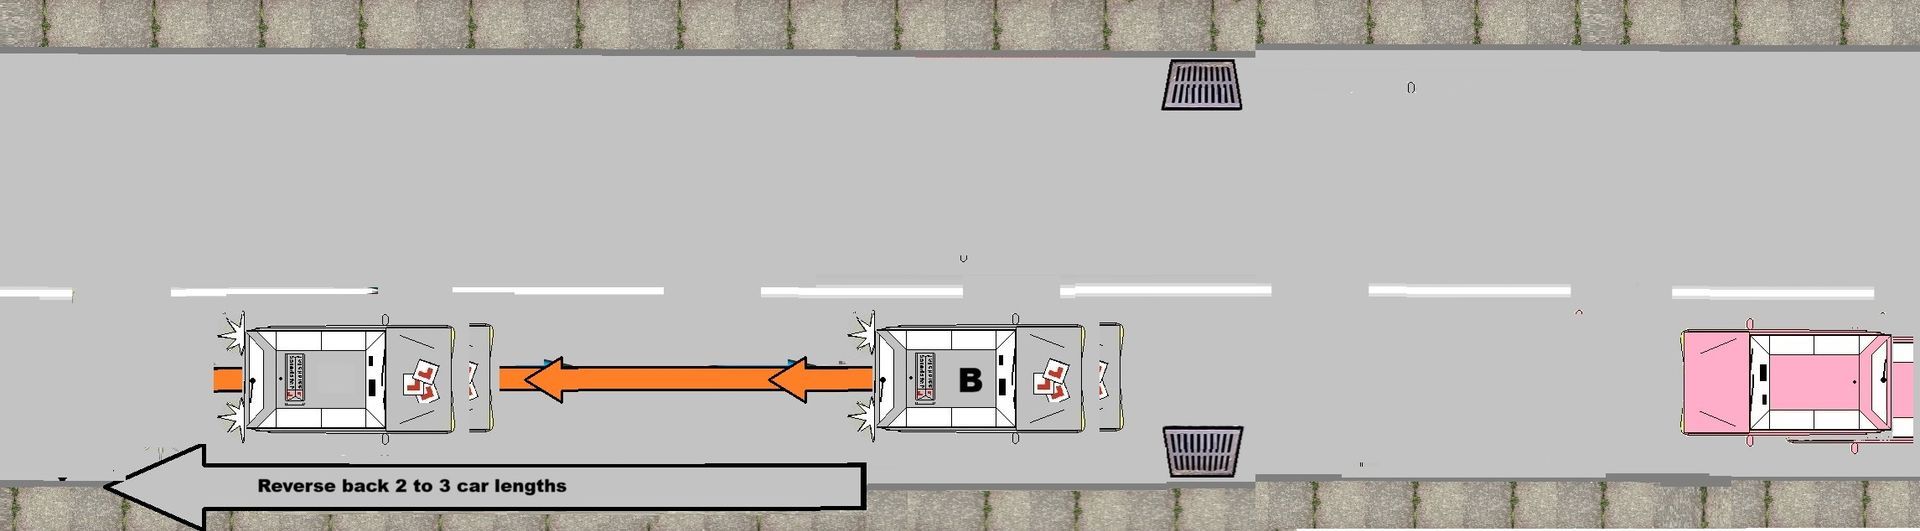
Now (only when safe) reverse back 2/3 car lengths or until your are instructed to stop
Now you are ready to reverse backwards a few car lengths.
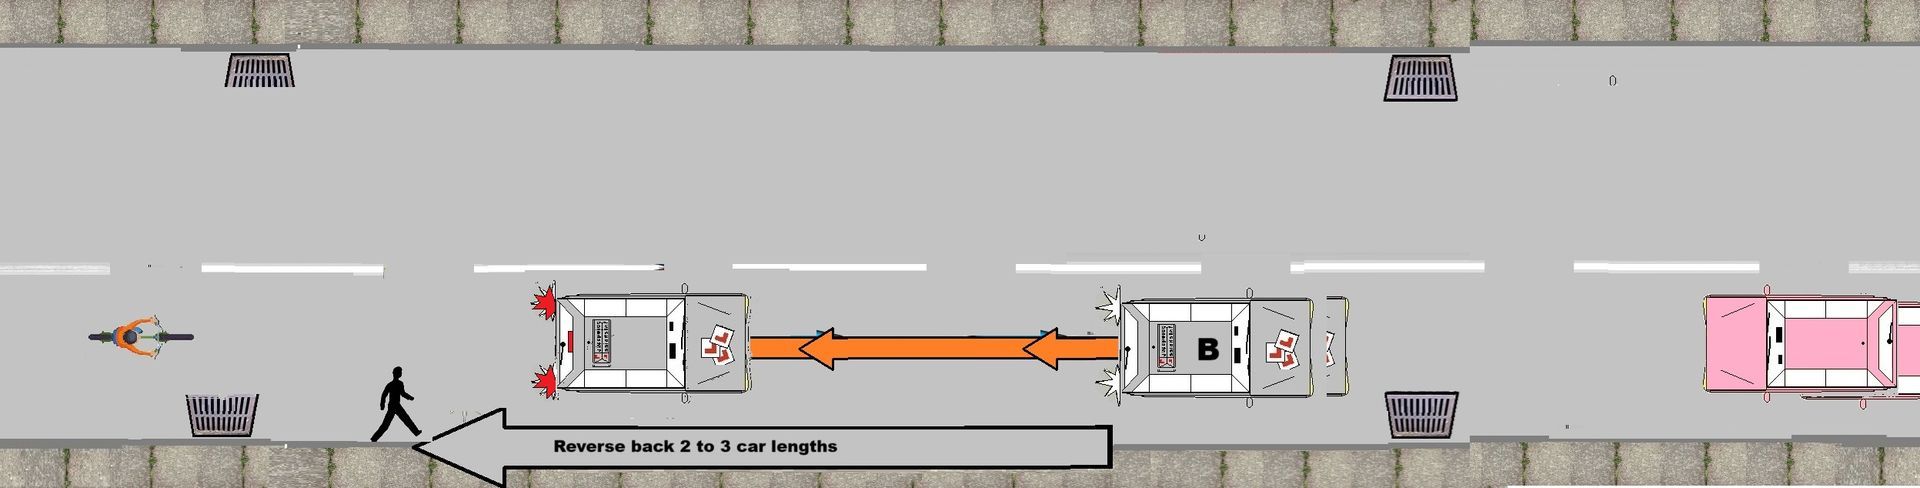
Move -slowly reverse back until you are asked to to stop or, you will also need to stop if you have vehicles driving towards you (front the end of your vehicle).
You will also have to give way to cyclist (from potentially ahead but they could be behind and for pedestrians walking towards the back end of your vehicle.
Stopping for vehicles, cyclist and pedestrians
If you need stop squeeze your brake pedal this will activate your brake lights to warn vehicle if they are behind you of your intensions. Also keep your gear in reverse so your reverse lights are visible.
When to give-way to on coming vehicles!
When vehicles, cyclists or pedestrians are coming towards you:-
1. When motor vehicles are coming towards you STOP then it is roughly
6/8 car lengths
from you.
2. When Cyclists are coming towards you STOP then it is roughly
3/6 car lengths
from you.
3. When Pedestrians are coming towards you STOP then it is roughly 1.5/2 car lengths from you.
Always stop and wait when vehicles appear to your front end of your vehicle (they are on the same side of the road as you).
- Apply your foot brake and stop while they go past you.
- Particularly watch for pedestrians or children on bikes crossing to your rear, again you need to give way and wait.
- If you’re revering crossing a driveway, watch for road users emerging from or wanting to turn into the driveway.
- Vehicles (from ahead)
- Pedestrians (from ahead and behind)
- Cyclists (from ahead and behind)
All round observations while reversing
Using clutch control and taking all round observations from the front and the sides of your vehicle every car length you go backwards (constant 6 point checks).
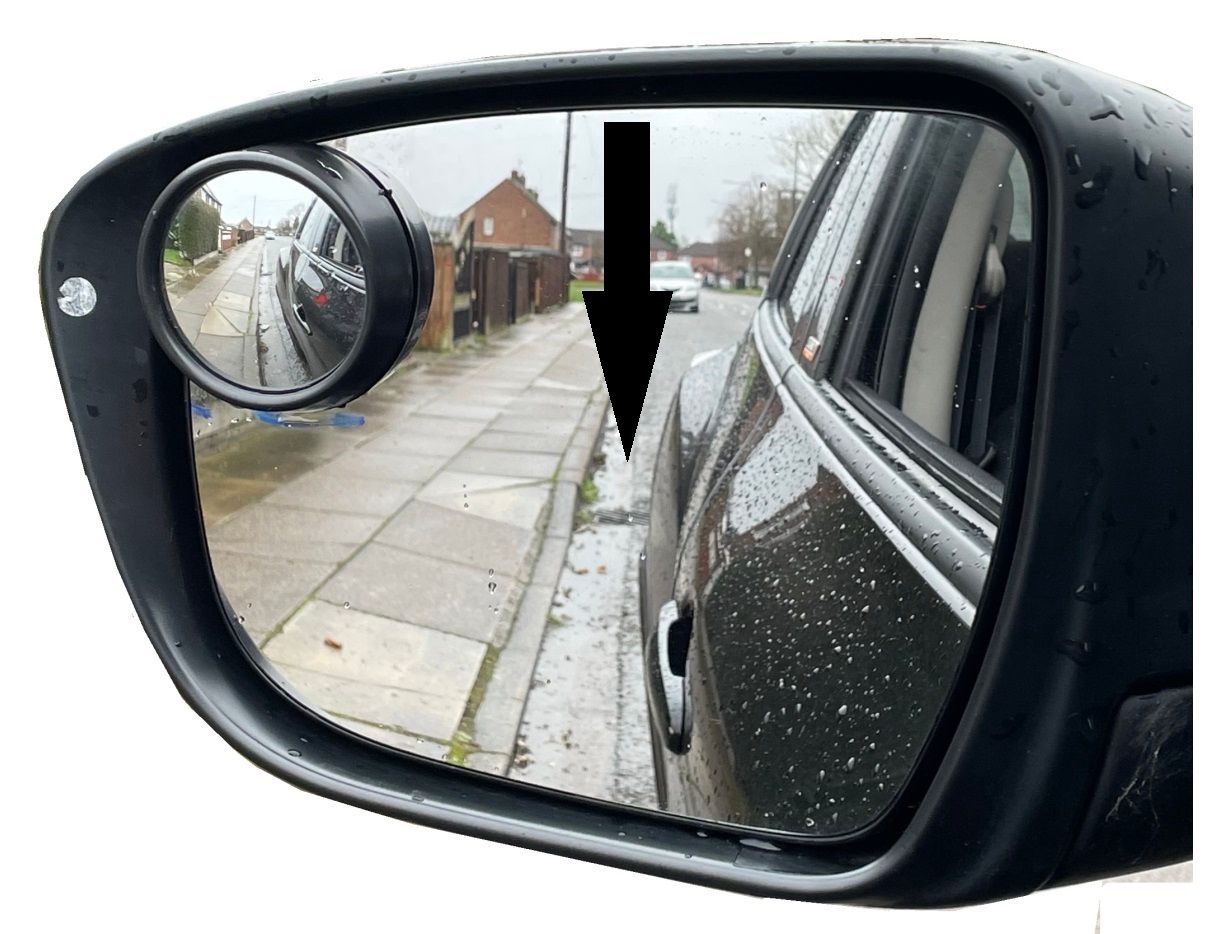
The off side door mirror may also be useful for checking the position of the vehicle in relation to the kerb.
Take all round observations of your vehicle at all times, so every car length you travel backwards look all around.
Clutch control
All the set manoeuvres should be undertaken at a very slow speed by using slow clutch control by moving your clutch a £1 thickness up and down from your biting point.
Once the reverse exercise is completed
Once you have reversed back 2 to 3 car lengths
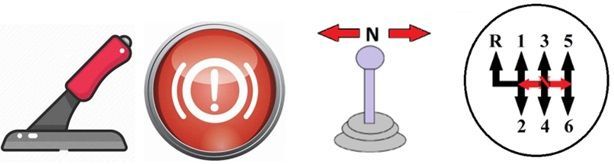
Making the car safe by applying your hand break and put gear into neutral.
Joining the traffic
Remember never sit with a left indicator in busy road traffic as it could be distracting to other drivers.
Only signal for pedestrians and cyclists as they could walk or cycle in front of you as they will not know you are driving off.
Always wait until it's clear and then make progress.
Teaching & Learning Strategies
Like mentioned earlier every student is induvial and each and everyone of you will progress at different rates so driving will adapt their lesson plan to help you achieve your driving goals.
- Your driving instructor will adapt their teaching style to suite your ability and ability
- Your driving instructor will continue to encourage you on your lesson and analyse any problems made and allow you to take responsibility for your own learning goals by giving you technical information to improve your techniques. Your technical feed back from your instructor will be ether given on the move or if feel needed by pulling you up on the side of the road somewhere safe, legal and convenient.
Rote learning (WikipediA)
Rote learning is a memorization technique based on repetition. The method rests on the premise that the recall of repeated material becomes faster the more one repeats it. Some of the alternatives to rote learning include meaningful learning, associative learning, spaced repetition and active learning.
At the end of your lesson
At the end of your lesson you will have a debrief with your instructor giving you the opportunity to reflect on your performance on your lesson then you can set up new goals for your next driving lesson.
This will also give you the opportunity to research any new topics that will be brought into on your next agreed lesson. So remember your instructor is there to HELP you, so on your driving lesson if you have any uncertainties or need anything rewording or recapping to make things any clearer, just ask.